Monday, November 30, 2015

New Tabistry Bodice/Vest Design - Experiments in Coloring Tabs


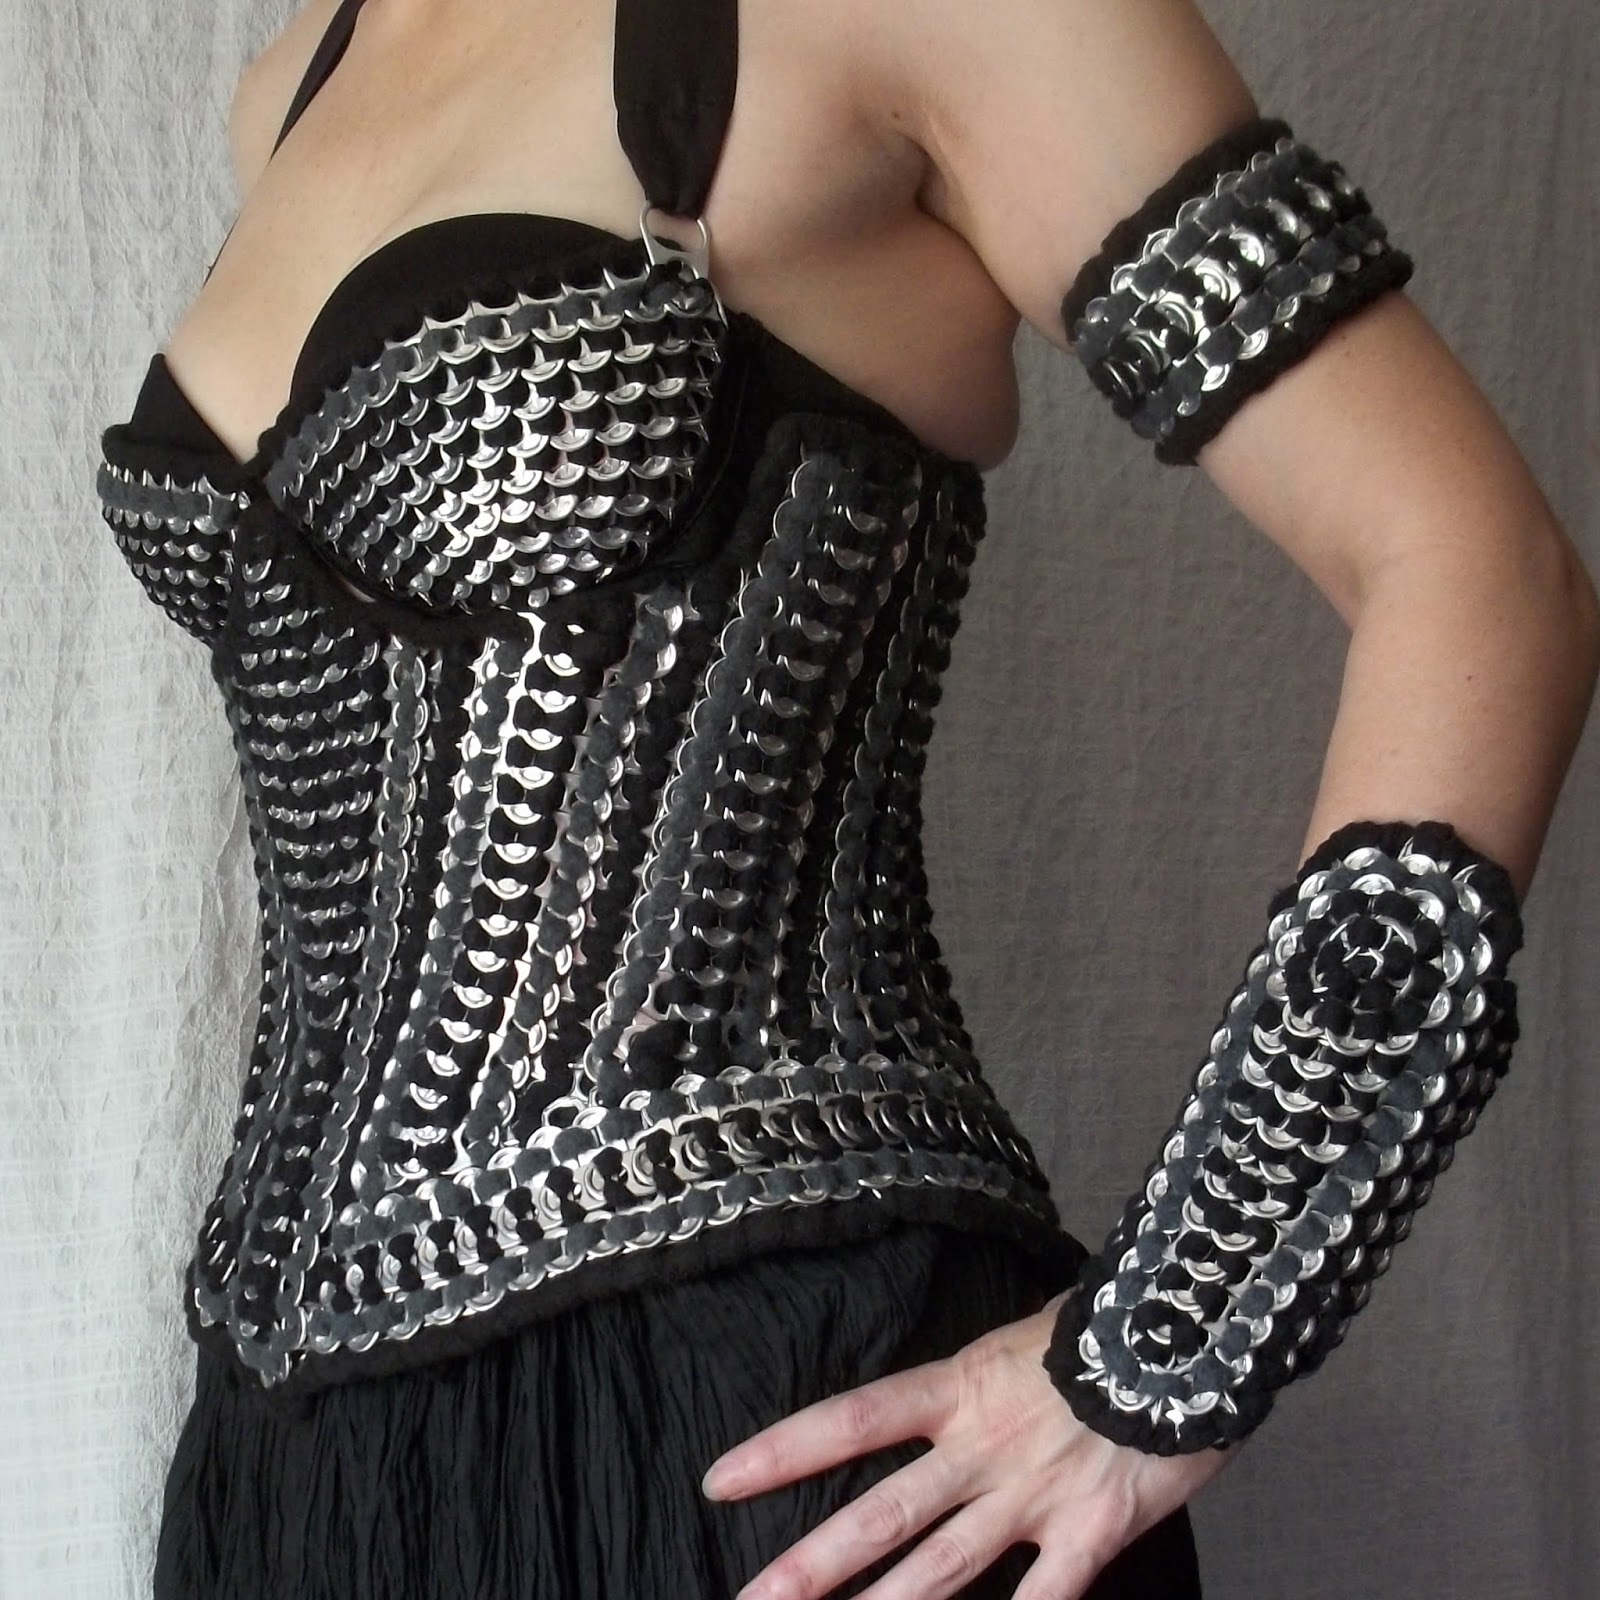
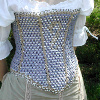
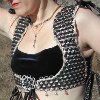
For this year of the Texas Renaissance Festival (TRF) I decided to test a design for a future Ghawazee-style coat.  I have started by making this shorter bodice/vest version for a close friend to get the fit right.  It is inspired by Moresca's Khadija Bodice.  I really liked the shoulders of their design.


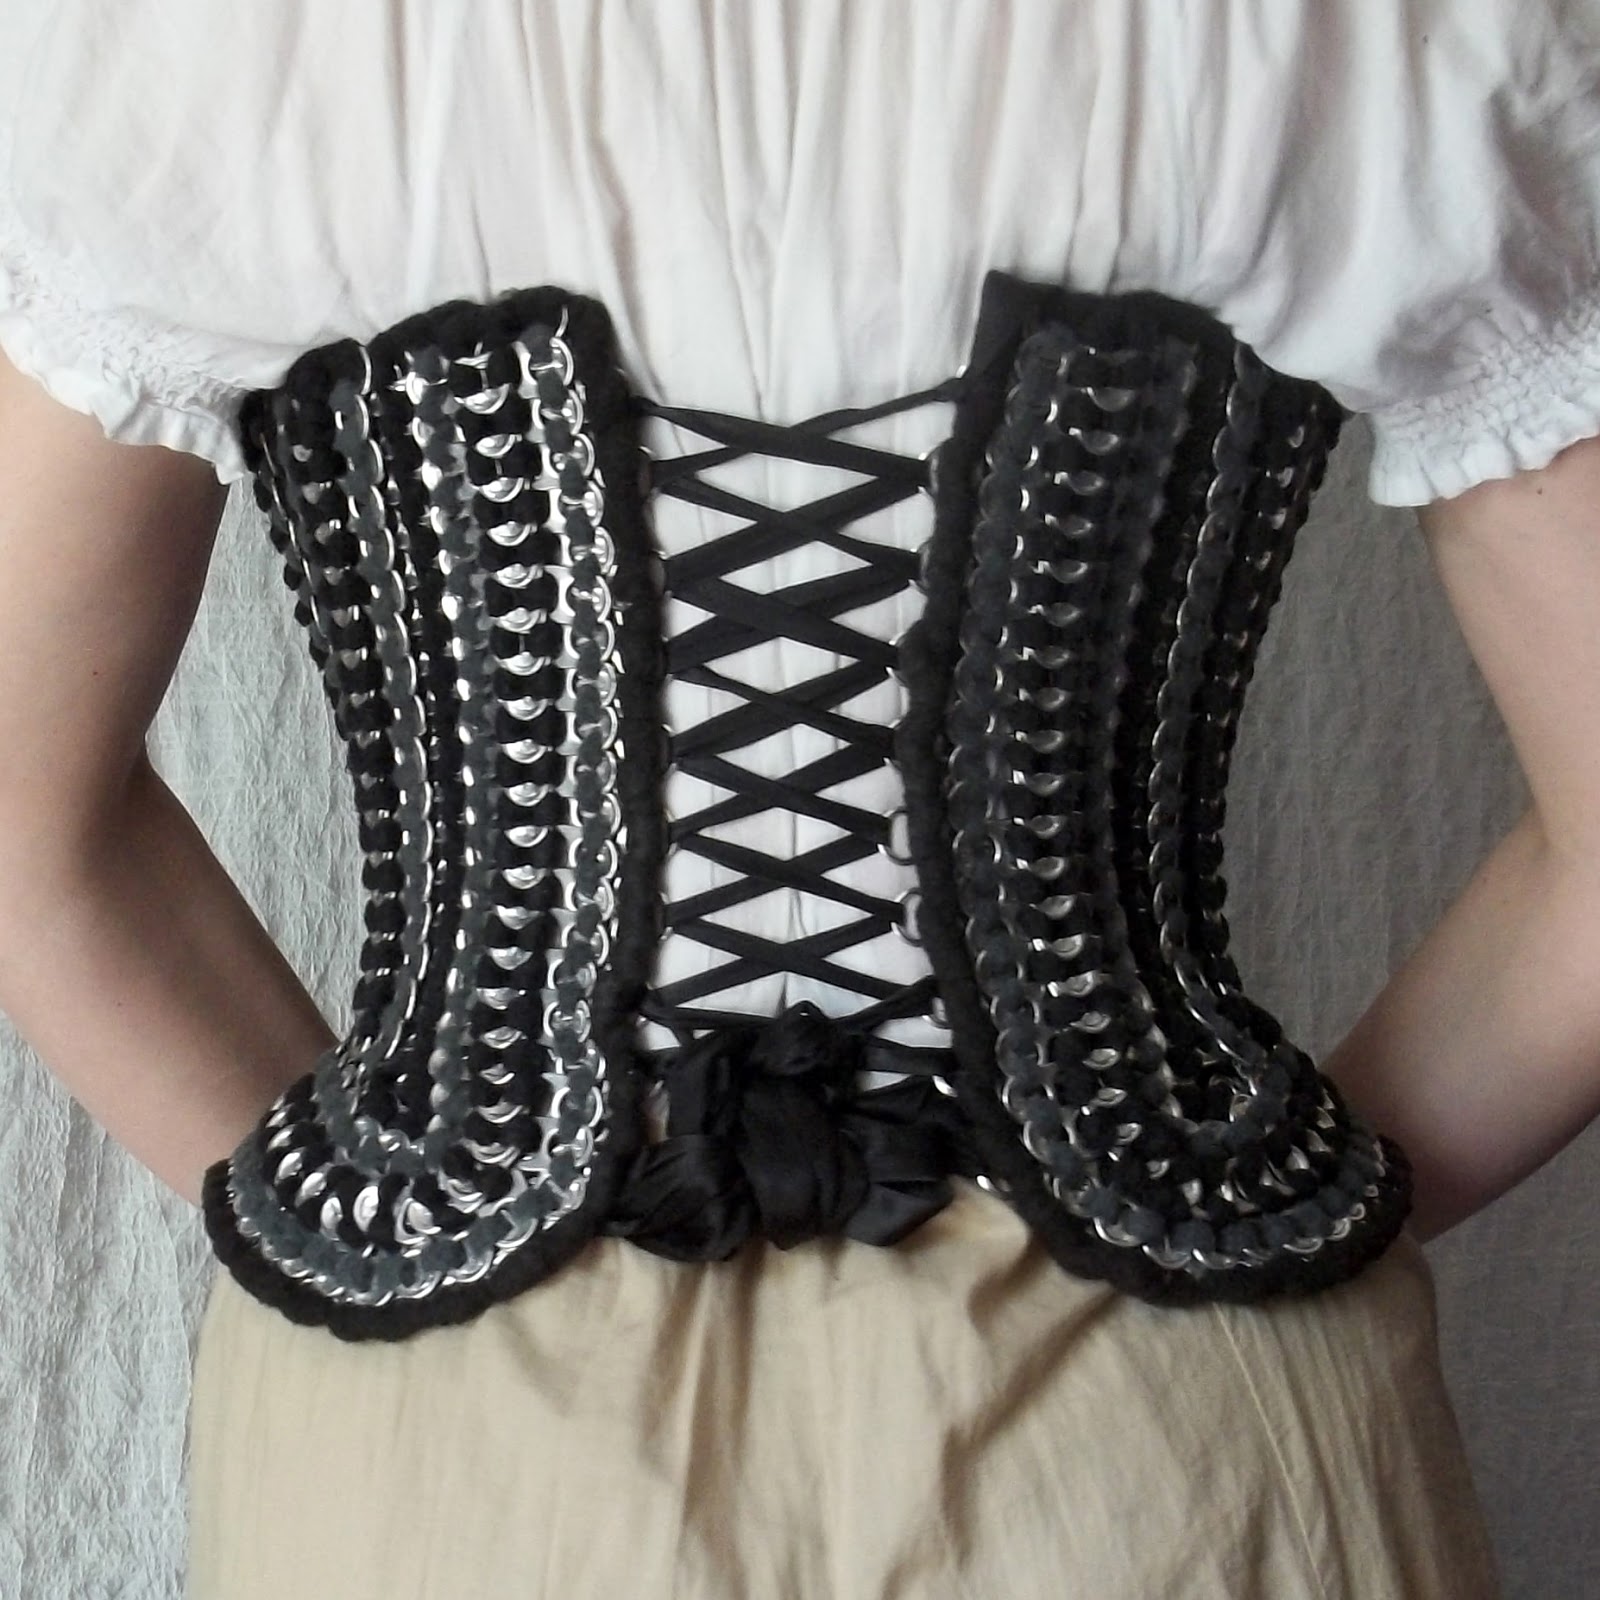
This one is more complex and tailored than the previous more simple Turkish-style vest I wear.  However, it still has the laces on the front and sides.  I'm hoping to start on the coat version for myself at some point before fall of next year.  I will extend the length down to probably mid calf or slightly shorter.


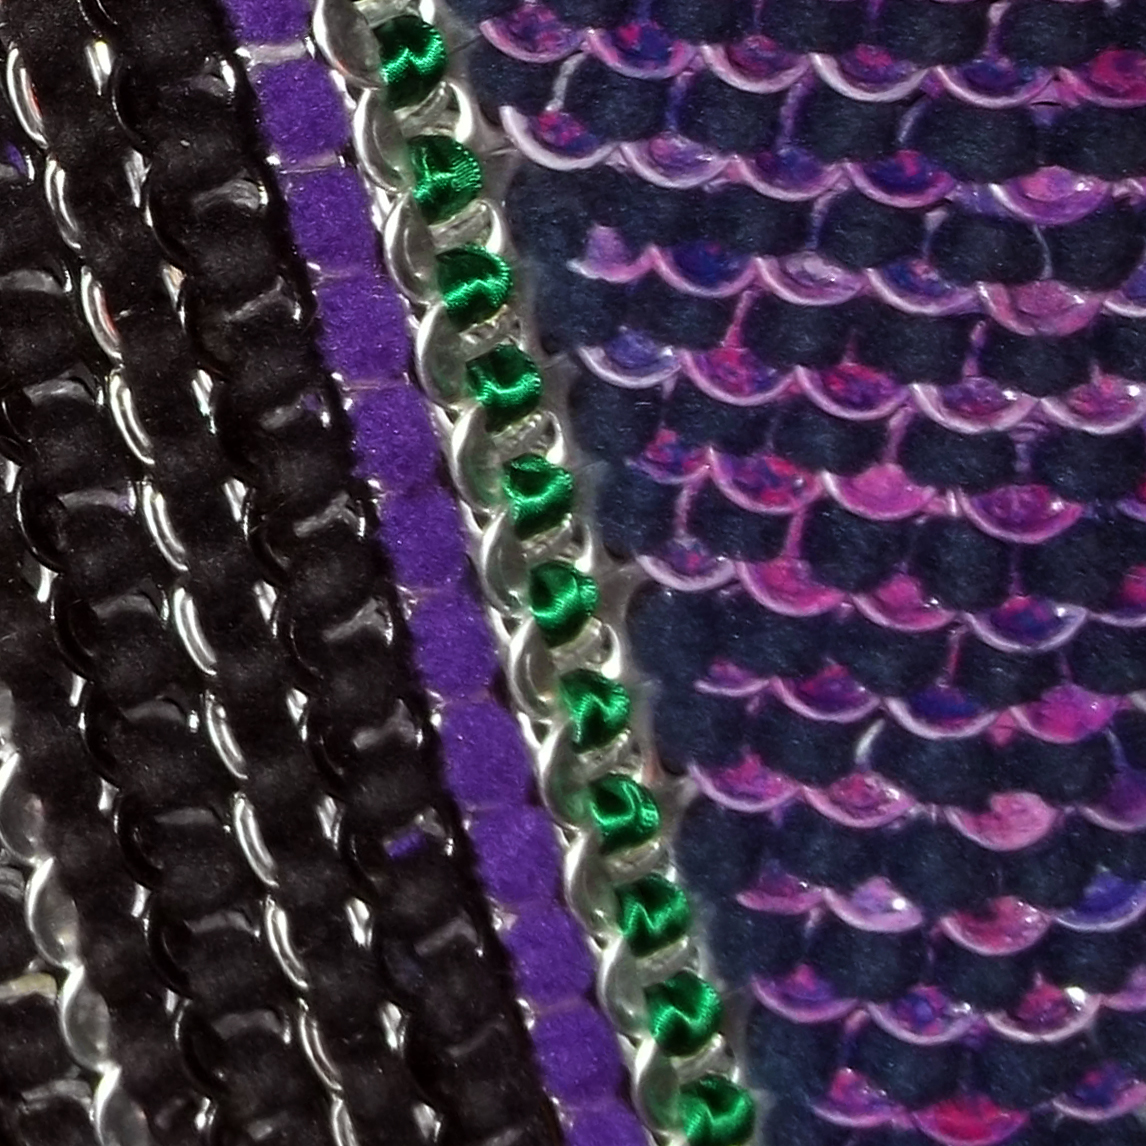
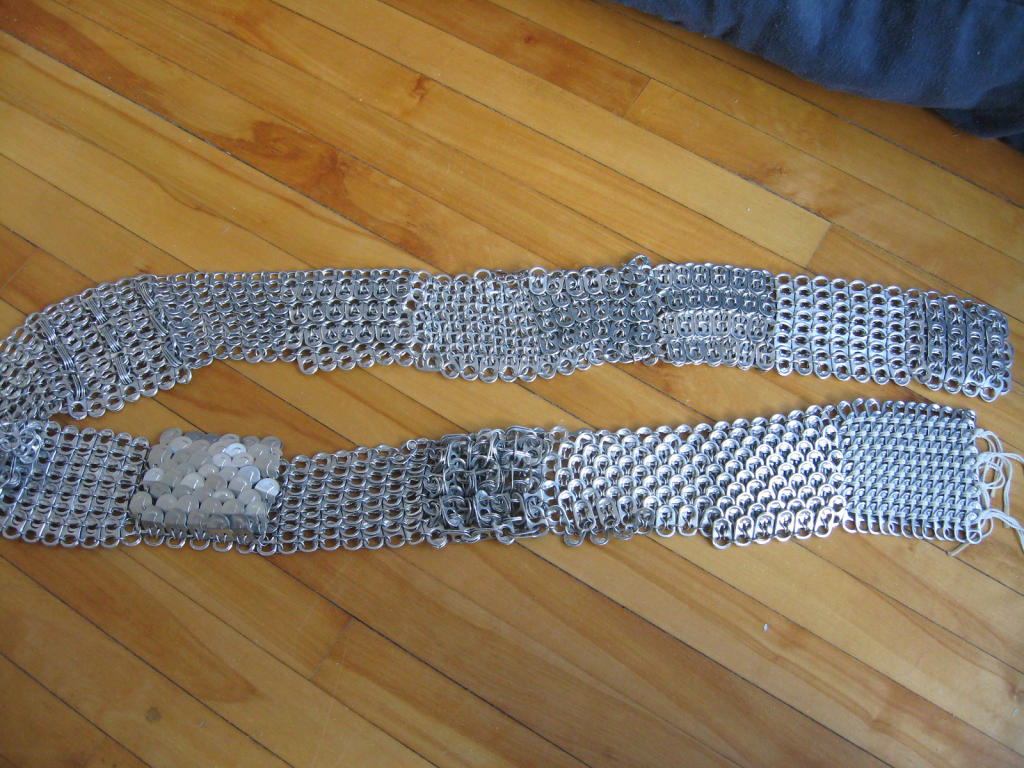
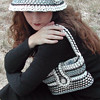
For her bodice, we chose green, purple and black to match skirts she already had.  I used purple, navy blue and black fabric polar fleece, but the green is a satin ribbon.  The satin really shines with the tabs, but can snag easily which makes weaving go slower.


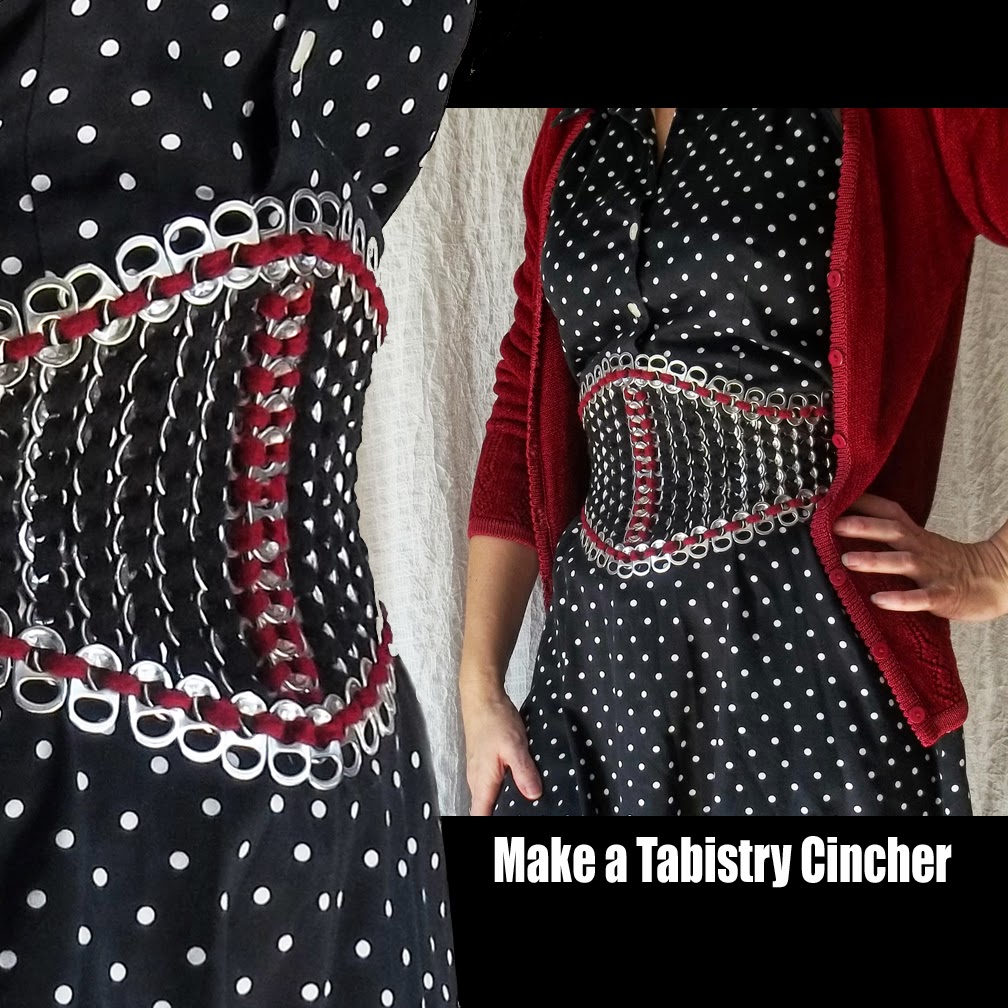
I did some experimenting with coloring tabs for this one.  (I believe I have mentioned trying oven cleaner to turn the tabs white.  This gives them a surface paint will adhere to better.)  I decided to color the white tabs with marker and seal with clear spray paint.  Though labor intensive, it worked really well.  The color is vibrant and stays on the tabs without scratching or chipping.  I also sprayed some of the tabs with gloss black.


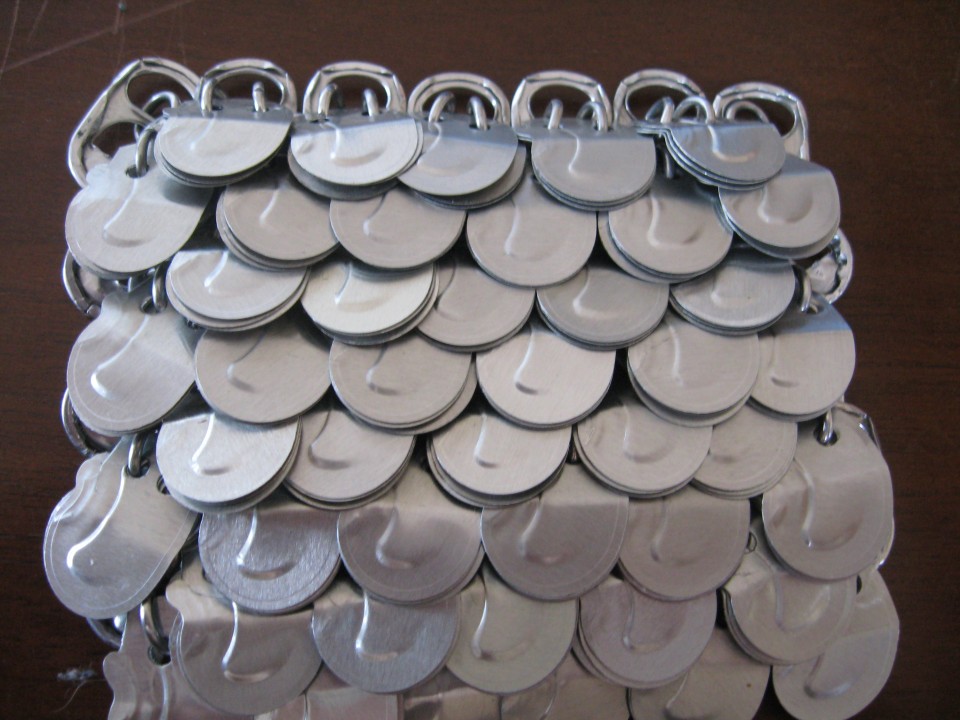
Here's another closer look at the purple and black tabs.  The purple tabs are actually a mixture of pink and violet waterbase marker.  I scribbled it on and blended the color by spraying with water.  To fix the color, I covered the dry tabs with a clear coat spray paint.


I'm please with how it looks and fits on her.  It's nice to be able to have color on the tabs that won't scratch off with normal wear.


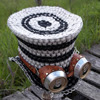
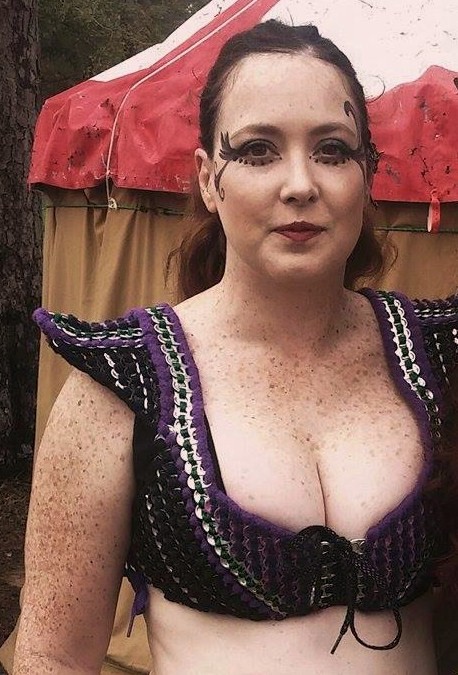
We had a blast at TRF this year.  We managed three trips down there.  It's so much fun each time in the faire as well as at the campground where these pics were taken. We seem to always have the best people camping around us.  Such a variety of creativity and talent!  This year we had ample good drummers, a flute/bagpipe player, a mead maker, a face/body painter and more.  The pics were taken while an extremely talented friend, Lauren, was doing some face painting.  She not only paints, but also makes some gorgeous jewelry using glass and other materials.  You can check out some of her work at FUZDcreations.

Probably won't hear much more from me before the end of the year.  Really wanting to have more time to make tabistry.  So many things I still would like to try, especially with corsets.  However, I think my New Year's resolution will be to get more tutorials finished.  Hopefully I will find a way to get them done faster.  Thank you for the patience with me.  Enjoy the Holidays!

Saturday, November 28, 2015

Tabistry Tribal Headdress with Hairfalls

Have a couple new projects to share.  First, I started a new, more elaborate, tabistry headdress for my tribal outfit.


The headdress is made in three tabistry parts.  The main wide top part joined to the 2nd narrow strip of tabs that keeps it standing up.  Then, lastly is the one across the forehead.  This last one keeps the headdress from falling back, and a black tie in back keep it from falling forward.  It stays on really well.


Didn't actually need to buy any supplies for this project.  I used leftover fabric strips to weave the tabs with.  Also used yarn scraps and random beads from my broken jewelry stash.  I tried a variety of techniques for wrapping and braiding the yarn.  Most were just added to the fabric strip ends that I left hanging from the tabs.  I did add two of my pistachio hairfalls and a couple artificial flowers that are just hair pinned on to the tabs so that they can be changed out easily.  Also added a large silver flower brooch to the top center.


I want to add some more dangles.  Maybe put some more hairfalls in the back.  Not sure if they should be a completely separate piece, or attached to the headdress.


This was a fun project that didn't take too long and not many tabs.  And, I even found a use for my older headband!  :)


You may remember my old tribal headband I created over five years back.  Since making this one, I added the old one to my belt.  (It's the top band across the top and the round pieces on the sides.)

Up next I plan to share a vest/bodice I made for a close friend.  Then, hopefully I will have made some headway on the top hat tutorial.

Thursday, June 11, 2015

Warrior Woman Tabistry Lamellar Armour - A New Underbust Corset/Bra Design in the Works


Tabistry lends itself well to appearing like chainmaille, or more specifically scalemaille.  Actually, I learned that weaving tabs is very similar to traditional lamellar armor making.  Lamellar armor is made up of small pieces of metal or leather held, or woven, together with cord of some kind.  So, I attempted an armor-like outfit for Sherwood Faire back in April loosely inspired by TV show Xena, the Warrior Princess.  (Had a wonderful time at Sherwood, btw!  Sorry, there were no action shots.)  I didn't get the arm bracers pictured here finished in time for faire, but I did mange to have the corset, bra and armbands wearable by then.


I've been making changes since then to improve the fit and comfort.  Still have some changes I'd like to make, but I think I'm content enough that I may just finish it up and start a new, more colorful, one.  ;)


Tried some new things on this one.  I used a narrow shaped front to give some extra room in the underbust, or rib cage.  I also shaped a sort of fender or "wheel well" up over the hip.  This gives the appearance of wider hips and a more dramatic silhouette.


I fear I may have made it a slight bit short in front and especially in back.  I don't find this one near as supportive on my back than previous longer line styles.  (I still need to tie off loose ends and secure them.  I can see where some of the stitches are loose around the hip  and bust at the moment.)


Excuse the lacing job, too.  :)  I also need to adjust height of where I tie the laces.  I think it's one set too low.  But, I also tried a different way of attaching the lace tabs.  They are more hidden on this one being set back from the edge.  Over time I imagine it will become more "seasoned" and close up completely in back.


The bust cups are attached to an existing black bra.  I cut the straps off and replaced them with a grosgrain ribbon one that goes around the neck.  I find this two piece style more easy to move around in without mishaps.  This is meant to be worn without an undershirt, and one piece overbust corset designs tend not to stay in place when bending and turning, which a warrior would need to be able to do, right?  :)


These blurry progress shots show it under the cloak I wore with it at faire.  I posted about it a long while back here.  Now, I just need to find some weapons.  Haven't decided what I should wield, yet.  At faire I wore several pointy metal hair sticks in my the bun on my head.  Next time maybe a shield/sword, but I think I prefer just a staff.


So, this is what I have so far.  I'm still tweaking little things.  No matter how many I make, I still seem to find new issues to solve each project I start.  I need to replace the laces for the arm bracers and make some boot covers in a similar style.  I was also thinking about make a short over-skirt type thing of strips hanging down similar to what roman soldier wore.

Hope you enjoyed this post.  And, remember to keep on being can-TAB-ulous!

Wednesday, April 1, 2015

Can Tab Daisy Basket, or Bowl, for Spring

I was working on a tutorial for making the small pink flower basket I posted about a couple years ago, when I decided to make another one.  But, I wanted to try some new things with this one.


This one is larger with 12 petals instead of only 6.  I also opted to leave off the handle, so it's more of a bowl than a basket.  I was experimenting with the shape of the petals, too.  I closed the openings in the tips off this time.  And, the front row of 6 are slightly wider than the back row.


Though I could easily add a handle, I kinda liked it without.  It should be perfect for putting dyed Easter eggs in, but I may use something like this to put loose tabs and material for working, especially when I'm teaching others.


The two rows of petals overlap due to the way they are woven together.  And, the natural tendency for the tab weave to curl creates the nice flared bloom.


When I was turning it over for the pics, I noticed it kinda looks like a tree stump, huh?  It even has the appearance of rings where the rows of tabs are woven together.  This might make a cute pedestal for other items.


The daughter likes it turned inside out.  When I was tying off the ends, she said it looked like a lotus blossom.  Guess it kinda does.  Maybe with another row around the bottom.


I'm working on getting the tutorials done for the top hats and at least one basket tutorial.  But, I've got another big costume project to share very soon.  It's going to include a new design for a corset.  Can't wait to get pics ready of that!  Until then, be Can-TAB-ulous!

Tuesday, February 24, 2015

Tabistry Waist Cincher

New Tutorial/Pattern for my Simple Waist Cincher is available!  This is a great project for a beginner or someone looking to make a medium sized project with about 500 tabs.  If a full corset looks too daunting, this is one you can learn a few skills/techniques from that will raise confidence levels.  It includes a few new techniques and options that are not in my corset tutorial.


I've worn my own cincher for some time now.  It's perfect for event we go to where there is a lot of dancing and moving that a full corset is too restricted for.  I made my first one way back after the pirate corset.  It's a form-fitting design, so there is little worry about fiddling to get the shaping just right as with my more complex corsets.


Though it is a "simple" cincher, this is is an indepth tutorial.  I cover just about everything you could ever want to know about how I constructed the waist cincher.  It includes detailed instruction for three different ways to fit the cincher from readymade pattern sizes (XS-XL) to custom pattern drafting for other sizes.  There are even suggestions for improving the shape of the readymade sizes to fit better.


I included details of how to lace up using what are commonly referred to as "bunny ears" in a variety of tab configurations .


I also include instructions for adding waist tape.  I think this is essential to improving the shape of the finished cincher.


My mom tried the Extra Large size.  To make it unique, and quicker to put on and take off, we added a front closure.  It was an experiment using two different sized tabs and binder rings.  (You know, those rings in the office supply section of stores used to hold hole punched paper together.)  I found a bunch of them at the flea market that I use for all kinds of things.


The binder rings worked really well and made her cincher more unusual in appearance.  But, I was pleasantly surprised to see the tabs held together pretty good on their own.  I need to get some pics of her wearing hers.


If you're interested in making one of these cinchers, you can find it here.  I think my next tutorial will be top hats or baskets.  We shall see.

Monday, February 16, 2015

PopScale and other Tab Maille from Pop Top Paladin

I have a few projects I'm excited to post about soon, but wanted to take a minute to share some really neat things being done with tab maille.  You may have seen chainmaille woven with tabs before, but John Andrews from Pop Top Paladin has come up with some really clever weaves.

One of my favorites is the version he calls "PopScale".  He goes into detail on how to produce it here.  It's not only made with can tabs, but with the inside cutout from the mouth opening of the can as well.


This is a sampler piece he created as a scarf with all kinds of different weave variations.

With many pics of projects and different variations of weave patterns, his site poptoppaladin.com  is really worth a look.  I look forward to seeing many new things that push the boundaries of can tabs from John!