Sunday, December 28, 2014

Stay Tab Tabbed Stays Revisited

Finally sharing some changes I made to my stays I posted here over a year and a half ago.  I try to do this to show how I solve problems in hopes that it may help those who are making their own corset or bodice.  If you're following our Tabistry group on Facebook, you may have seen pics of my first round of alterations.  I've been slowly tweaking different aspects of this particular project ever since then and wearing each version to various events.  I thought it would be great to also show the wonderful shots the hobbyist photographers have so graciously captured of my ever-evolving outfit.


This was taken by Chris Howard at Scarby in 2013 just after I finished the first attempt.  I found the stays were too short in front and the bottom tabs weren't as evenly spaced as I would have liked.  Plus, in my haste I didn't get time to fix the repeating "V" pattern in lower half of the front.  I did really like the black, brown, and teal-ish color-scheme.


My next set of alterations were made before just before October 2013 and worn to the Texas Renaissance Festival.  Michael Lawhorn and Megan Elizabeth got some lovely shots of us outside the Sea Devil Pub for All Hallow's weekend.  (If you're curious, Mr. Sam was dressed as Baron Samedi, while I went as a witch.)   I tried widening the shoulder straps, which I didn't end of liking.  I also changed the front by fixing the "V" pattern, making it longer and adding tabs that branch out to a fork in front.   I also changed the bows on the front of the straps.  (I may eventually go back the the black ones depending on my outfit.)  Overall, I like the longer front.  But, it had a tendency to bend forward with the poofy layers of my bustle, petticoats and the pretty brown skirt I found at a local thrift store that matched my bodice.


Here are two pics Moon Dawg took while we were hanging out after the parade about 6 months later at Scarby in 2014.  As you can see, I went back to narrow shoulder straps, but kept them permanently attached in the back, which helped them not fall off my shoulders as easily.  The only other change made was making the "tabs" along the bottom fan out more evenly by unweaving between the strips up the sides a little.  Seems I got the waist too low when I made the front longer.


In this photo by Shawn Johnson, you can see we decided to repeat our costumes from the year before at TRF this past October for yet another Halloween weekend.  This was the last event I wore these stays, and this is where I'm at on the changes so far.  I added a busk and satin ribbon waist tape for a much better fit around the waist area. I also raised the back up and out at the shoulder blades, which supports the straps even more.


Here you can see the progression of the front.  I hope it has all been improvements. You may notice it is longer now and more shapely at the waist.  Not sure I will ever attempt tabbed tabistry stays again.  I like the silhouette, but think I prefer shaping the sides over the hip in one solid piece.


It isn't pretty, but here's a pic of the internal satin waist tape and a wooden busk used to reinforce and prevent stretching and distortion around the waist area.  The stretchless satin ribbon continues all around the waist.


The changes in the back were the most frustrating.  But, I settled on raising it up higher over the shoulder blades as is more traditional with this style.  (And, as I now know helps keep the shoulder straps up and in place.)  You can see how the waist tape changed the shape of my figure in back of the third image on the right here, as well.  It allowed me to bring in the lace gap more without too much stress on the aluminum tabs.  I've also decided on brown shoe lace for the spiral lacing.  It's laced a bit tighter than I would normally lace it, and the daughter didn't get the top tied correctly, but it was pretty good for her first time helping me.  I think I need to raise the start of the lacing up a wee bit at the bottom so the tabs don't pull in together like that.

Super happy with most of it now.  Still learning a lot about fitting and better construction in my experimenting.  It may not seem like dramatic differences here, but getting it right makes a world of difference in overall appearance and comfort.  I should get a tutorial available for this and various other projects some time next year after the store is open again.

Thursday, December 4, 2014

Esty Store "On Vacation" from Now Until After the New Year

Regretfully the popularity of my tutorials has caused me some problems with Etsy and Paypal.  I will definitely be back in early January, though sadly I may need a new venue other than Etsy.  I'm looking into a few store options and a site called Craftsy.  If anyone has any suggestions, I'd love to hear your opinion on the best way to go.

If you are curious why, you can read more about it on my general crafting blog here.

Friday, August 15, 2014

Fancy Wide Sunhat

In my last post I shared the first of two hats I created for a fundraiser event we were supposed to attend last weekend.  Here is the second, a wide sun hat.


The twisting effect of the crown top inspired me to try an interlocked twisting top on this hat.  I made 10 chains of tabs that I wove in between each other in a kind of Celtic knot design.


I tried to carry the twisting overlapping effect onto the brim, too.  This particular chain technique will flex side to side, but not give very much when bent forward or back.


I was able to insert an acrylic gem into the weave on the center top.  (I like that it didn't require glue or anything to keep it in.)  Though, the addition of the gem on top kinda makes the top a little pointy.


The openness of this sunhat design reduced the number of tabs significantly.  This and the use of the gift wrap ribbon used really lightened the weight of this wide hat.


I think this would make a really neat effect for a basket.  I've been wanting to eventually put together some designs for baskets.  Wonder what else I can come up with before I get to it.  Until then, be can-TAB-ulous!

Thursday, August 14, 2014

A Crown for a King (with a twist)

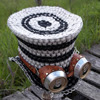
Made a couple new hats for a fundraiser event we were supposed to attend this past weekend.  Unfortunately, I didn't feel well the night of the event and didn't make it.  :(

But here is the first of the two hats.  It's a king's crown.


I experimented with a few new things.  I used inexpensive gift wrap ribbon to weave these.  It is fairly strong and doesn't stretch, so it makes a very rigid piece, but it frays and splits easy.  I doubled the 3/4" wide ribbon over to make it even stronger.


In the end I added a wire frame around the base on the inside to make the crown keep it's flared shape better and make it feel more like an inflexible metal crown.  I used matching metallic gold fabric glue to add a large acrylic gem on the top.  There are smaller gems attached to the tabs on the sides like I did for my "crownlace".


However, when I had finished assembling the parts, I noticed that I was able to twist the top around.


  I thought that was kinda neat.  And, it inspired the design of the hat I will post next.

Saturday, June 14, 2014

DIY Upcycled Drinking Coupe from Disposable Bottles - Crosspost from Mieljolie.blogspot.com

Thought this post was related enough to cans and tabs to post here, too.


I recently made a drinking cup out of a couple disposable bottles for a camping event.


Even made a "rimmer" to coat the edge of the cup with salt or sugar.

You can read more about it at mieljolie.blogspot.com.


Tuesday, April 1, 2014

A Look Back on Corsets/Bodices

***  UPDATED to include newer bodices/corsets  ***
A comment made during my early corsets/bodices experimenting has been stuck in the back of my mind to this day.  Someone basically said all corsets pretty much look the same.  And, that is just simply not true.  I've learned so much about proper fitting and different styles after studying what was popular throughout history.  Each style has a particular purpose for a different silhouette.  I've been looking back through the corsets/bodices I've created with can tabs these past years.  I thought putting them all side by side would be a neat comparison.  This ought to show the naysayers that corsets, especially those made of tabs don't all have to look alike, right?  (You can click the image below for a larger view.)


These were my tabistry interpretations in order of creation* from left to right:

  1. Empire Waist Bodice 2008, inspired by late 18th century Italian. (turned into belly dance costume)
  2. Cone-shaped Bodice 2008, inspired by 16th century bodices.
  3. Waist Cincher 2008/2015, inspired by "waspies", or short corsets of the 1900's. *
  4. Hourglass Corset 2009, inspired by the Victorian hourglass shape.  (used in this ballgown outfit),
  5. Underbust Steampunk Corset 2012, inspired by underbusts worn throughout history.
  6. Victorian Gusseted Corset 2013, inspired by Victorian Hourglass/Pipe Stem styles.
  7. Tabbed Stays 2013, inspired by long triangular 18th century stays.
  8. Underbust with Bra 2015, warrior woman inspired modern style set.

*  The waist cincher (third on over) is a reconstruction after I cannibalized the original to reuse the tabs on other things. (So glad I don't have to resort to that anymore!)  The one shown was actually completed after the red/black gusseted corset (#6).

There are also a few pieces that are not shown here.  They are the green bodice I made my mother, a pink bodice for my daughter, and my Turkish Vest/Bodice.  One other is a cupped corset I started and never finished.  I took some progress pics of the cupped corset a long time ago, but I never seemed to get the fit right.

I think I've come a long way.  Of all the styles, I've found that the Victorians really took their corsetry to new levels.  They can be quite complex.  If you're curious, I think the Gusseted Corset is my most successful and easy to recreate.  (This is one reason it is the first to become a tutorial.)  The middle corset above, light blue and tan, was the most difficult to construct/alter due to the shape of the individual panels.

Its funny how I took these shots (except the last one) awhile back when I'd had a little too much sun.  I was pretty proud of myself for lacing them all on my own for the pics.  Some need a bit of adjustment, but I didn't have an assistant available to help.

In the future, I would like to attempt a few other styles such as a more S-curve corset and revisit stays and modern cupped styles.  I'll hopefully be posting the changes to the Tabbed Stays in the near future.  I plan to wear it this weekend to Scarby ren faire.  Crossing fingers I can get some decent pics.  And, of course, I've still got several tutorials on my to do list.