Showing posts with label clothing. Show all posts

Monday, November 30, 2015

New Tabistry Bodice/Vest Design - Experiments in Coloring Tabs


For this year of the Texas Renaissance Festival (TRF) I decided to test a design for a future Ghawazee-style coat.  I have started by making this shorter bodice/vest version for a close friend to get the fit right.  It is inspired by Moresca's Khadija Bodice.  I really liked the shoulders of their design.
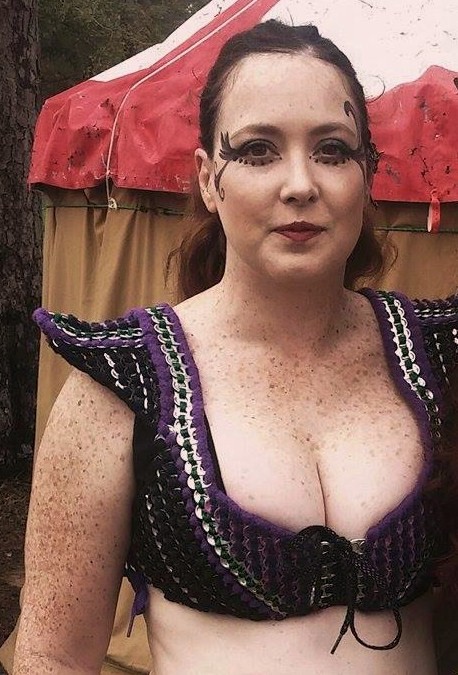


This one is more complex and tailored than the previous more simple Turkish-style vest I wear.  However, it still has the laces on the front and sides.  I'm hoping to start on the coat version for myself at some point before fall of next year.  I will extend the length down to probably mid calf or slightly shorter.
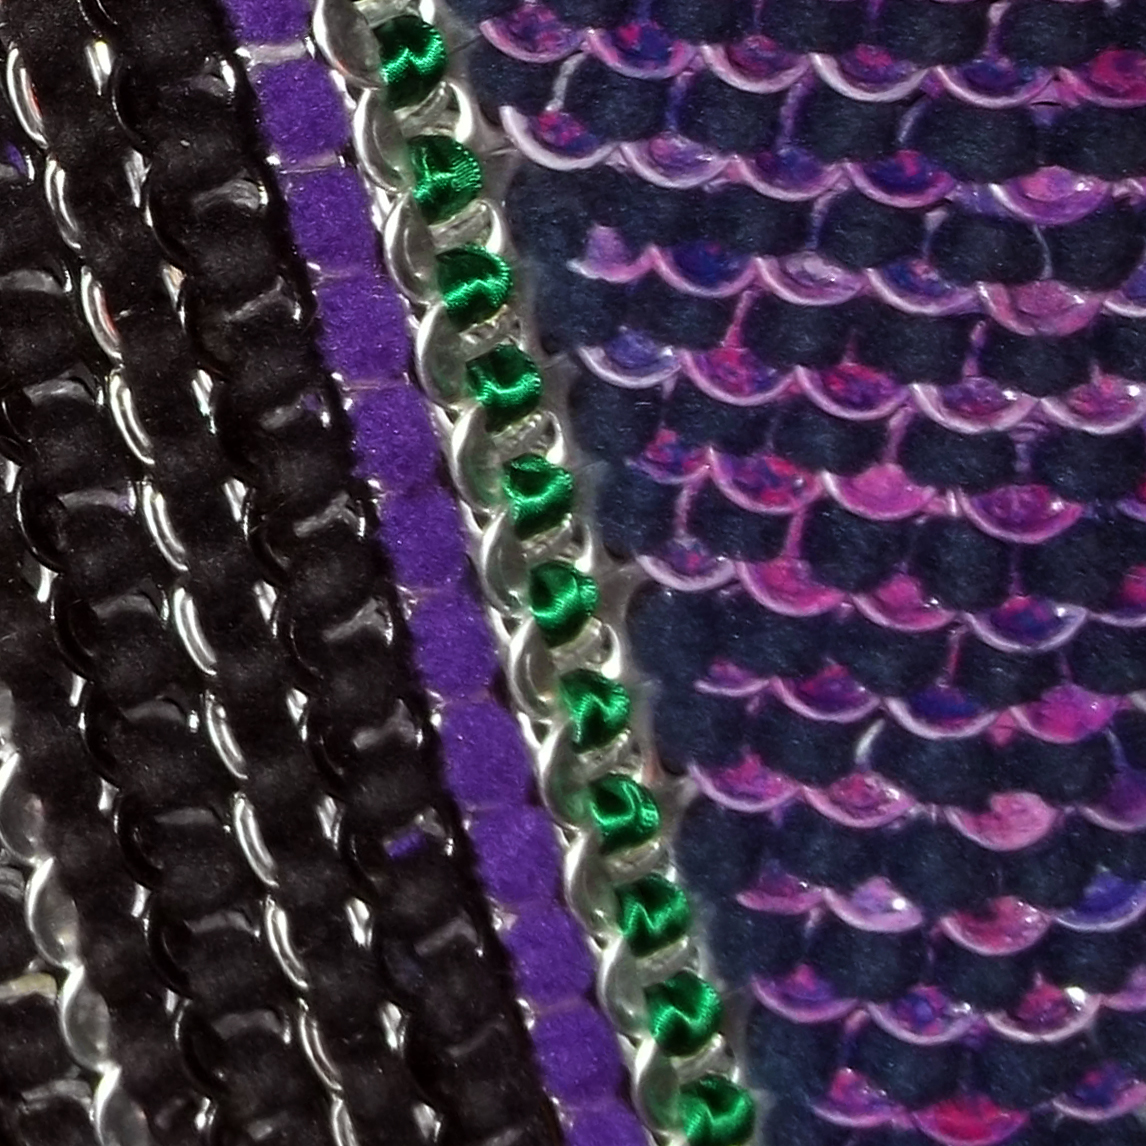


For her bodice, we chose green, purple and black to match skirts she already had.  I used purple, navy blue and black fabric polar fleece, but the green is a satin ribbon.  The satin really shines with the tabs, but can snag easily which makes weaving go slower.


I did some experimenting with coloring tabs for this one.  (I believe I have mentioned trying oven cleaner to turn the tabs white.  This gives them a surface paint will adhere to better.)  I decided to color the white tabs with marker and seal with clear spray paint.  Though labor intensive, it worked really well.  The color is vibrant and stays on the tabs without scratching or chipping.  I also sprayed some of the tabs with gloss black.


Here's another closer look at the purple and black tabs.  The purple tabs are actually a mixture of pink and violet waterbase marker.  I scribbled it on and blended the color by spraying with water.  To fix the color, I covered the dry tabs with a clear coat spray paint.


I'm please with how it looks and fits on her.  It's nice to be able to have color on the tabs that won't scratch off with normal wear.


We had a blast at TRF this year.  We managed three trips down there.  It's so much fun each time in the faire as well as at the campground where these pics were taken. We seem to always have the best people camping around us.  Such a variety of creativity and talent!  This year we had ample good drummers, a flute/bagpipe player, a mead maker, a face/body painter and more.  The pics were taken while an extremely talented friend, Lauren, was doing some face painting.  She not only paints, but also makes some gorgeous jewelry using glass and other materials.  You can check out some of her work at FUZDcreations.

Probably won't hear much more from me before the end of the year.  Really wanting to have more time to make tabistry.  So many things I still would like to try, especially with corsets.  However, I think my New Year's resolution will be to get more tutorials finished.  Hopefully I will find a way to get them done faster.  Thank you for the patience with me.  Enjoy the Holidays!

Saturday, November 28, 2015

Tabistry Tribal Headdress with Hairfalls

Have a couple new projects to share.  First, I started a new, more elaborate, tabistry headdress for my tribal outfit.


The headdress is made in three tabistry parts.  The main wide top part joined to the 2nd narrow strip of tabs that keeps it standing up.  Then, lastly is the one across the forehead.  This last one keeps the headdress from falling back, and a black tie in back keep it from falling forward.  It stays on really well.


Didn't actually need to buy any supplies for this project.  I used leftover fabric strips to weave the tabs with.  Also used yarn scraps and random beads from my broken jewelry stash.  I tried a variety of techniques for wrapping and braiding the yarn.  Most were just added to the fabric strip ends that I left hanging from the tabs.  I did add two of my pistachio hairfalls and a couple artificial flowers that are just hair pinned on to the tabs so that they can be changed out easily.  Also added a large silver flower brooch to the top center.


I want to add some more dangles.  Maybe put some more hairfalls in the back.  Not sure if they should be a completely separate piece, or attached to the headdress.


This was a fun project that didn't take too long and not many tabs.  And, I even found a use for my older headband!  :)


You may remember my old tribal headband I created over five years back.  Since making this one, I added the old one to my belt.  (It's the top band across the top and the round pieces on the sides.)

Up next I plan to share a vest/bodice I made for a close friend.  Then, hopefully I will have made some headway on the top hat tutorial.

Tuesday, February 24, 2015

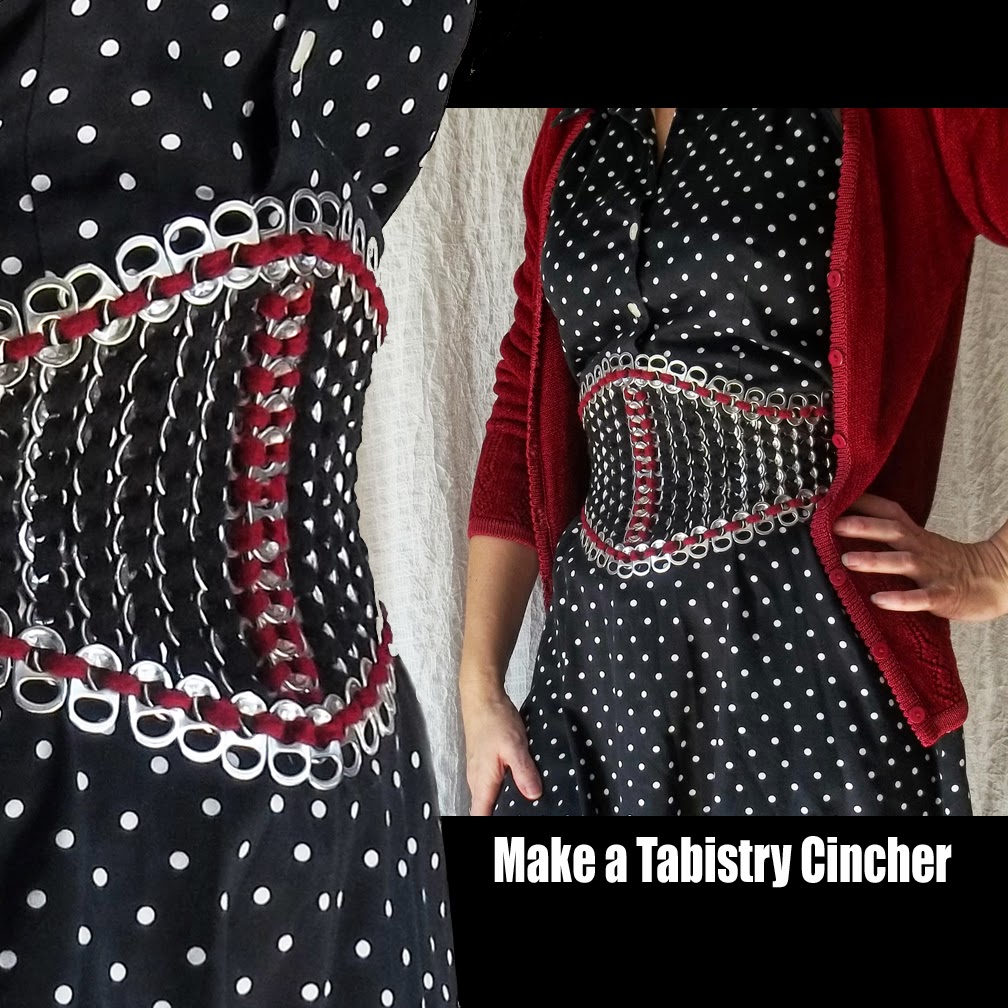
Tabistry Waist Cincher

New Tutorial/Pattern for my Simple Waist Cincher is available!  This is a great project for a beginner or someone looking to make a medium sized project with about 500 tabs.  If a full corset looks too daunting, this is one you can learn a few skills/techniques from that will raise confidence levels.  It includes a few new techniques and options that are not in my corset tutorial.


I've worn my own cincher for some time now.  It's perfect for event we go to where there is a lot of dancing and moving that a full corset is too restricted for.  I made my first one way back after the pirate corset.  It's a form-fitting design, so there is little worry about fiddling to get the shaping just right as with my more complex corsets.


Though it is a "simple" cincher, this is is an indepth tutorial.  I cover just about everything you could ever want to know about how I constructed the waist cincher.  It includes detailed instruction for three different ways to fit the cincher from readymade pattern sizes (XS-XL) to custom pattern drafting for other sizes.  There are even suggestions for improving the shape of the readymade sizes to fit better.


I included details of how to lace up using what are commonly referred to as "bunny ears" in a variety of tab configurations .


I also include instructions for adding waist tape.  I think this is essential to improving the shape of the finished cincher.


My mom tried the Extra Large size.  To make it unique, and quicker to put on and take off, we added a front closure.  It was an experiment using two different sized tabs and binder rings.  (You know, those rings in the office supply section of stores used to hold hole punched paper together.)  I found a bunch of them at the flea market that I use for all kinds of things.


The binder rings worked really well and made her cincher more unusual in appearance.  But, I was pleasantly surprised to see the tabs held together pretty good on their own.  I need to get some pics of her wearing hers.


If you're interested in making one of these cinchers, you can find it here.  I think my next tutorial will be top hats or baskets.  We shall see.

Tuesday, April 1, 2014

A Look Back on Corsets/Bodices

***  UPDATED to include newer bodices/corsets  ***
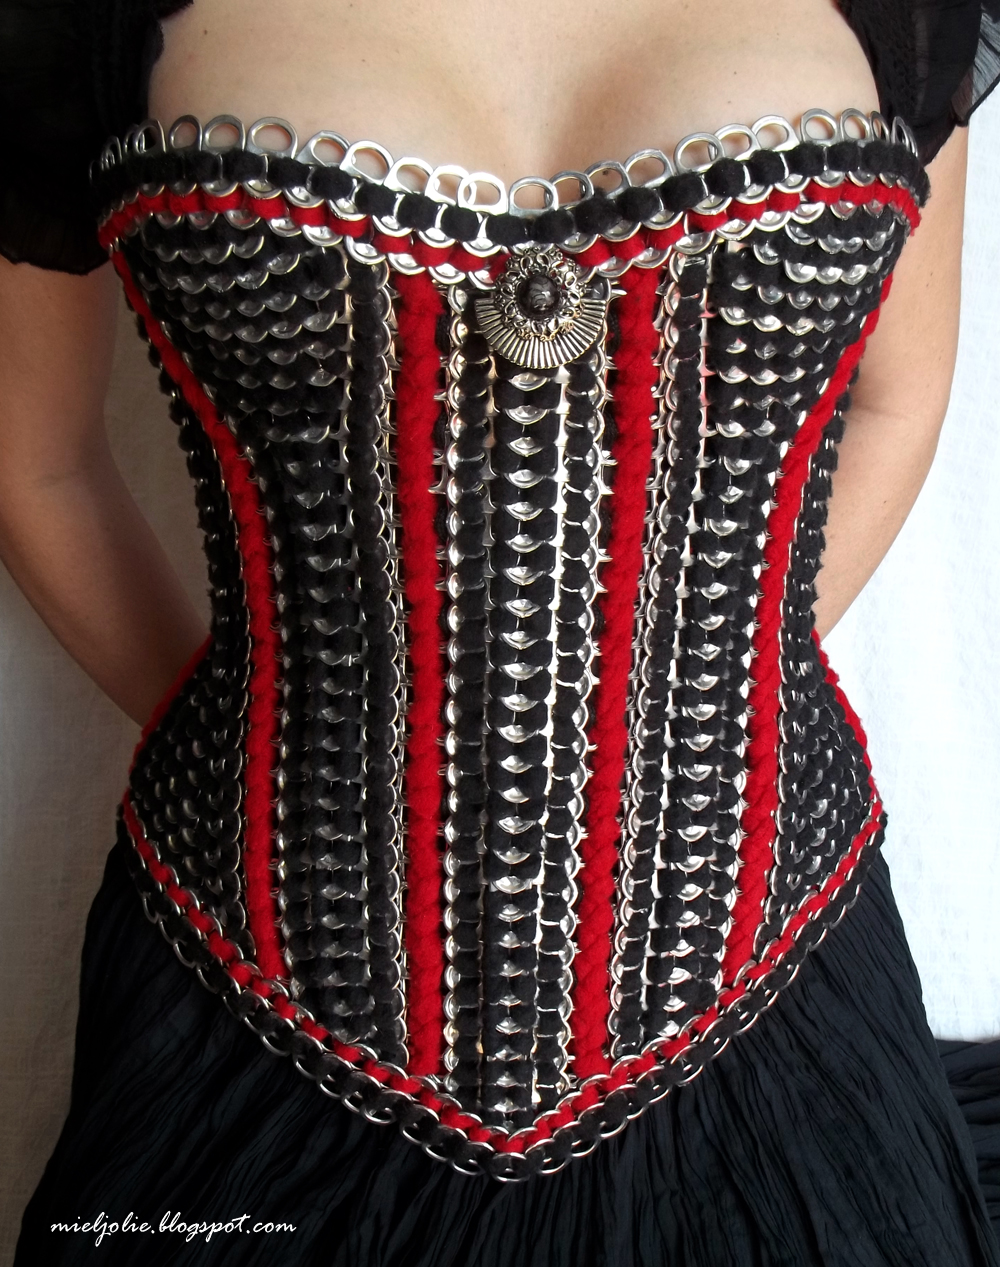
A comment made during my early corsets/bodices experimenting has been stuck in the back of my mind to this day.  Someone basically said all corsets pretty much look the same.  And, that is just simply not true.  I've learned so much about proper fitting and different styles after studying what was popular throughout history.  Each style has a particular purpose for a different silhouette.  I've been looking back through the corsets/bodices I've created with can tabs these past years.  I thought putting them all side by side would be a neat comparison.  This ought to show the naysayers that corsets, especially those made of tabs don't all have to look alike, right?  (You can click the image below for a larger view.)


These were my tabistry interpretations in order of creation* from left to right:

  1. Empire Waist Bodice 2008, inspired by late 18th century Italian. (turned into belly dance costume)
  2. Cone-shaped Bodice 2008, inspired by 16th century bodices.
  3. Waist Cincher 2008/2015, inspired by "waspies", or short corsets of the 1900's. *
  4. Hourglass Corset 2009, inspired by the Victorian hourglass shape.  (used in this ballgown outfit),
  5. Underbust Steampunk Corset 2012, inspired by underbusts worn throughout history.
  6. Victorian Gusseted Corset 2013, inspired by Victorian Hourglass/Pipe Stem styles.
  7. Tabbed Stays 2013, inspired by long triangular 18th century stays.
  8. Underbust with Bra 2015, warrior woman inspired modern style set.

*  The waist cincher (third on over) is a reconstruction after I cannibalized the original to reuse the tabs on other things. (So glad I don't have to resort to that anymore!)  The one shown was actually completed after the red/black gusseted corset (#6).

There are also a few pieces that are not shown here.  They are the green bodice I made my mother, a pink bodice for my daughter, and my Turkish Vest/Bodice.  One other is a cupped corset I started and never finished.  I took some progress pics of the cupped corset a long time ago, but I never seemed to get the fit right.

I think I've come a long way.  Of all the styles, I've found that the Victorians really took their corsetry to new levels.  They can be quite complex.  If you're curious, I think the Gusseted Corset is my most successful and easy to recreate.  (This is one reason it is the first to become a tutorial.)  The middle corset above, light blue and tan, was the most difficult to construct/alter due to the shape of the individual panels.

Its funny how I took these shots (except the last one) awhile back when I'd had a little too much sun.  I was pretty proud of myself for lacing them all on my own for the pics.  Some need a bit of adjustment, but I didn't have an assistant available to help.

In the future, I would like to attempt a few other styles such as a more S-curve corset and revisit stays and modern cupped styles.  I'll hopefully be posting the changes to the Tabbed Stays in the near future.  I plan to wear it this weekend to Scarby ren faire.  Crossing fingers I can get some decent pics.  And, of course, I've still got several tutorials on my to do list.

Saturday, May 11, 2013

Corset Pattern Finally Available!

I know I've been promising a corset tutorial for a really, REALLY long time.  I feel bad making those who have requested it wait so long.  I just want them to be as clear as I can get them, so there isn't any frustration.  Well, good news!  I've got one finally available on Etsy!


This is the pattern for my Gusseted Corset.  It is much simpler to fit/alter than the other paneled ones.  Besides being a wee more complicate to weave, it really is easier to get a good fit.  Just know that it will set you back about 2000 tabs.  That's close to a half of a gallon worth.


I'm so happy that Etsy is now offering "Instant Digital Downloads". No more waiting for me to setup and send file links after transaction. You ge the files as soon as payment is complete. So, that means I also won't have to watch my inbox 24/7. Though, I probably will anyway. :)  So, anyone who tries the instant dl, let me know how your experience goes.  If I need to switch it back to manual, I'm happy to do so.  YOu can find the corset pattern at :

https://www.etsy.com/listing/150885162/tabistry-gusseted-corset-pattern-and

I do still plan to make the paneled corset patterns available to those who want them, but I'm still fussing with the alteration instructions.  I also have plans for including a pattern for a simple waist cincher.  Look for that to be available soon.  (And, this time I MEAN very soon.)  :)

Tuesday, April 16, 2013

Stay Tab Tabbed Stays!* ;)

I've made revisions to these stays.  Go here to see the results.

****************UPDATED*****************

Say that five times fast!  Haha!  (Oh dear.  Is my geek showing?!)


Been working on a new Corset/Bodice design. This one is inspired by the triangular-shaped Rococo, or late Baroque style Bodices from the 18th century.  It has straps and "tabs" all around the bottom edge.


While I was writing up the corset tutorial, I realized I was missing this important style that I'd really wanted to attempt.  So, conveniently, I decided to remedy this just in time for faire last weekend.  :)  I still have some changes I would like to make to it.


For one, I started adding a "V" pattern about a third of the way up. I need to fix the lower portion, and I want to make the front longer anyway. And, I'd like to  change the back and make the straps permanently attached there. I'm also thinking of adding something like "waist tape" to strengthen the waist of the corset and maybe some "stays", or a busk in front.
* If the title of this post has confused you, I'll explain. If it wasn't ironic enough to have a tabbed corset made of tabs, you might be interested in another nerdy bit. These corsets were once referred to as "stays" (used plural) due to the boning. AND, the modern type of can tab I used are referred to as "stay tabs" because they stay on the can unlike the older "zip tops". So, technically these would be Tabbed Stays made with Stay Tabs!  :)   I'll post this corset again when I get the changes made.  But, hopefully not before the corset tutorial is finished and up.  Until then, be can-TAB-ulous!!

Tuesday, February 26, 2013

Victorian Hourglass-style Tabistry Corset - Take 2


Been working on the long overdue Tabistry Corset Tutorial, but got distracted by an idea to try shaping a new corset with something like gussets, or inserts.  I promise, I am trying to get the tutorial done.  Hey, at least this way it may come with another pattern option.  :)


Not sure why I keep trying new styles of corsets/bodices.  It's just a fun challenge for me.  And, I like wearing them.  (Kinda like a portable hug.)  ;)  I remember someone posted that essentially there isn't much difference in corsets and that all can tab corsets will look the same.  I think that's a bunch of poo.  And, I'd like to thumb my nose at that comment.  On my previous corsets I've posted about, I'd always shaped the panels flat and joined to achieve a curve.  Doing this, it was hard to alter the corset once it was woven. So, this time I tried just making a bunch of vertical strips, kinda like on the last tabistry top hat.  I started joining the strips at the waist being the narrowest part. Then added in what was needed at the bust and hips.  So, much easier to alter if you don't get it just right.  As you can probably see, this can allow for a more drastic transition in width, too.  And, I can add or subtract from the vertical strips to get the right length all the way around. Plus, it gives a bit more support for the bust, now that I can actually shape it more like a cup.  Though, this could easily be made into an underbust, as well.


You can't see it, but I've got a removable wooden paintstick "busk" down the front to keep it stiffer.  It really wasn't necessary, and I may not actually wear it, but it does prohibit me from slouching.  That center decoration in front was just an odd earring I found.  I was going to tie a ribbon bow there.


I laced it with two (actually four) laces starting at the center back.  I think this is called "bunny ears"?  It makes the corset stay tighter at the center to help the hourglass-shape.  Oh, and sorry, felt I had to "photoshop" this last pic of the back.  I only had bright neon orange shoelaces to try it on with.  So, I used some magic to make them a quick red to match.  Just wish I had these red laces.  When I wear it on the for an upcoming event, I will probably replace this with black ribbon. 

I'm really pleased with the way this one turned out.  It's a great fit and easier to make/alter.  Can't wait to wear this to a steampunk event in March!   The only negative side to it was the number of messy looking ends to tie off on the inside, which I could have reduced if I'd put a little forethought into it.  Guess I will never be completely happy.  I still want to try some other styles of corset in the distant future, but I will try not to let them distract me from getting the tutorial finished.  Until then, be can-TAB-ulous!!

Monday, August 4, 2008

New Hats! And, future tutorial!

I've got 2 new hats to show off!

Just finished a topless for my Great Aunt Claudine made with yellow t-shirt scrap and multi-colored yarn.

claudine's can tab hat

The other is a sun hat made with blue and white fleece strips that was made by request for a fellow crafter on http://www.craftster.org/. She's giving it as a gift to someone who collects hats. I tried some new techniques on this one. I figured out a way to weave muli-colored patterns (hard to see the music notes here) and a new way to attach the pieces together. Mom is modeling it til I can get some pics from the new owner.

can pull tab sun hat

can pull tab sun hat top

can pull tab sun hat

I'm currently working on a tutorial on creating tabistry and how to make a pop top hat. I may also work on a "how to" video as well. So, in the near future, anyone interested will be able to get a copy to create their own.

***** UPDATE 09/18/09 *****

Thank you to everyone who have helped make my tutorials better. I now have two up finished and now on Etsy.com (when in stock) here:

mieljolie.etsy.com

I opted not to use craftedonline.com at this time. I may in the future, but for now I will just stick with Etsy.

Wednesday, July 2, 2008

Mom Needs a New Pair of Shoes!

Well, just like the title reads, my mom was complaining about not having comfy shoes to go with her outfit. So, I said, "Why not make some!" Out of can tabs, of course! One day later, here one is:

mom's shoe top

shoe side

mom's oufit with shoe

mom's can tab shoe right

Strange style for her outfit, I know, but they definitely fit her personality. :) She says they are comfortable, but we will have to field test that at TRF before a true judgement can be made. We need a louder bell, jewel, or charm for the toe.

***********************************************

As requested, here is a pattern for making a shoe like the one above. This is a simplified version. The original has a left and right side, but I altered it so it would be easier.

can tab shoe pattern
To join the two pieces, I tied the ends of the top and bottom toe point together. Then pulled a separate strips of fabric/cord between the two layers on each side of the shoe starting at the top most point. Pull the ends out of the first holes on either side of the top point. Then, start weaving into the next hole of the top layer down thru the bottom layer and then move over a hole on the bottom layer and up thru the same top hole. Then move over to the next top hole going down to the next hole in the bottom layer. Keep repeating this until you reach the last hole of the top layer. Be sure to alway go to a new hole on bottom and the same hole on top to get the curled toe.

When the toe is finished, continue around the shoe to soften the edge and make the opeing smaller. Next, with a new strip start joining the side to the bottom 'til you reach the back. I ran a strip of vertical tabs up the back to hold the two sides together. The last tab should stick up in the back where you could add a lace to tie them around your ankle.

I highly recommend lining the inside with soft fabric for extra cushion.

*********************************************
The illustration below shows how to create the staggered weave pattern needed to make the shoe.:
staggered can tab pattern

Friday, June 27, 2008

New Bodice

can tab bodice black and red

Inspiration struct me the other day, so I started one using the corset pattern maker at: http://www.elizabethancostume.net/custompat/index.html. Just wanted to see how accurate the measurements would be with the tabs. Wish I would have found this before I started the first bodice for mom. Much easier. I've also created my own can tab pattern in Adobe Illustrator where I superimposed the tabs over the image created by the online pattern maker. Still working on little tweaks like the spacing, but, now I don't need to guess on the shape. Yeah!! Here is the front so far:

can tab bodice

I've removed the AI pattern I posted here. If you would like to acquire it, please pm or email me. Sorry for the inconvenience.

I've been told the style looks like something from the Nutcracker Ballet.

As you can tell in the pic, this horizontal tabs are spaced much to far apart in AI causing it too be to wide. This is actually as good thing because of the stretchiness of the bodice. Anyway, I wanted to try adding variety by making a subtle pattern in the weave by turning the tabs over in places (as you can barely see in the above pic). Didn't show up that well, at first. But, it gave me another idea to run a contrasting cord through the upside-down tabs. More color! Look closely in the far left corner of the bodice in the first pic in this post.

I'm running into some problems with the victorian-style experiment I mentioned because I used nonstretchy shoelaces and weaved them too tight, I think. The lacings under the arms will not line up straight. Argghh!

****************UPDATE******************

Pic from TRF with flat cap hat
soda tab corset and hat

Wednesday, June 25, 2008

Pirate/Cavalier Hat

This hat has evolved a lot since I started it. Originally we wanted a tricorn hat. I used black shoelaces with skull/crossbone print, hence the spotty-look.

Sun hat-style before I pinned up the sides:

can tab hat on post

can tab hat on post

Hat at the present moment with Dr. Pepper can flower pinned to side and ostrich feathers:

Can Tab Pirate Cavalier Hat

Here's mom modeling her hat.

mom's in her can tab cavalier hat

mom's can tab cavalier hat

My empire waist bodice

I pretty much used up most of my supply of tabs on mom's bodice, but wanted to wear something to the faire as well. So, I created a much shorter project for myself.

can tab bodice

And, the back while I was fitting it.

can tab bodice back

my can tab outfit

There is just something about dressing up to go to a ren faire that make it more fun!

Breakdown of costs:

Can Tabs = FREE
Dk Blue Velour = n/a (fabric from old jogging jacket)
Orange/Brown Braided Trim = ? ($4 for huge 20+ yard spool braided with leather)
Shoelace lacing on sides of bodice= 30 cents a pair (eBay lot)
Chemise = $1 (thrift store fabric)
Removable Over skirt and Sleeves = $1 (remnant clearance fabric)
Aqua-colored Jewel = ? ($2 for package of 10?)
Bottle cap setting for Jewel = FREE
____________________________________
Total = $2.30