Light Blue Corset Gusseted Corset Turkish Vest Steampunk Corset Stay Tab Tabbed Stays Striped Top Hat Black and Gray Top Hat Fancy Sun Hat Cavalier Hat Pirate Tricorne Crownlace Purse and Hat Mask and Mini Top Hat Lunchbox Purse and Kozie Armband


@pinterest-site-verification=e3efd7d2752bd2f5bc0d23d4f1da97b7
Showing posts with label hat. Show all posts

Tuesday, October 13, 2026

Tabistry Witch Hat in Time for Halloween!

 
I've been planning to make this hat for years.  Even had someone inquire about how to go about making one a while back.  Well, finally got to it...and before Halloween even!  And, so happy with it.
 
 
I will be wearing it with the tabbed stays pictured here.  I like the curvy old stovepipe look I was able to get with this weaving technique.  I will need that wide brim for the sun.

I plan to wear this to All Hallow's weekend at TRF (Texas Renaissance Festival) coming up soon.   Still trying to figure out what accessories to wear.  I think I need to find a ways to attach one of our adorable Cornish Pixies to my outfit.  I've been debating on bringing props and accessories, like a broom or wand.  I always hesitate to bring extra things to carry, as I tend to lay them down and leave them.  :/

I will, of course, bring my pouch and a tankard with holder on by belt.  I posted about my tankard covers just before this post.  This was the only pic I have shared with one of them.  Oops!  But, sadly I lost the moth that the daughter made.  We're talking about remaking some more of these (will post it on mieljolie.blogspot.com if we do).  I would love to pin some to my hat and tankard again.  They were so cute and made from scraps and a safety pin!  I believe she was inspired by a picture on Pinterest. 


Also still working out other accessories and jewelry.  I think a tabistry necklace would be nice.  Maybe use the same turquoise gemmed tabs like the bodice and hat trim have. 

We took these pics goofing around the backyard herb spiral and greenhouse.  It's a mess back there!  We haven't been working on it much this summer.  I've been too busy with other things, and let the garden get a little too dry and overgrown (Even the ollas can't save the plants, if I don't fill them up!  Haha).  I do love having fresh herbs.  Hopefully most have them have survived the heat.  Can't say the same for the strawberries. :(  But, the grapevine is doing well and should shade the spot for the strawberries.  Once it grows in a bit, I will replant the strawberries.

That's it for now! I will be posting the pattern for the hat on Patreon for the Tabistry members (https://www.patreon.com/mieljolie).  I also have my other tutorials available there in my shop.

Friday, August 15, 2014

Fancy Wide Sunhat

In my last post I shared the first of two hats I created for a fundraiser event we were supposed to attend last weekend.  Here is the second, a wide sun hat.


The twisting effect of the crown top inspired me to try an interlocked twisting top on this hat.  I made 10 chains of tabs that I wove in between each other in a kind of Celtic knot design.


I tried to carry the twisting overlapping effect onto the brim, too.  This particular chain technique will flex side to side, but not give very much when bent forward or back.


I was able to insert an acrylic gem into the weave on the center top.  (I like that it didn't require glue or anything to keep it in.)  Though, the addition of the gem on top kinda makes the top a little pointy.


The openness of this sunhat design reduced the number of tabs significantly.  This and the use of the gift wrap ribbon used really lightened the weight of this wide hat.


I think this would make a really neat effect for a basket.  I've been wanting to eventually put together some designs for baskets.  Wonder what else I can come up with before I get to it.  Until then, be can-TAB-ulous!

Thursday, August 14, 2014

A Crown for a King (with a twist)

Made a couple new hats for a fundraiser event we were supposed to attend this past weekend.  Unfortunately, I didn't feel well the night of the event and didn't make it.  :(

But here is the first of the two hats.  It's a king's crown.


I experimented with a few new things.  I used inexpensive gift wrap ribbon to weave these.  It is fairly strong and doesn't stretch, so it makes a very rigid piece, but it frays and splits easy.  I doubled the 3/4" wide ribbon over to make it even stronger.


In the end I added a wire frame around the base on the inside to make the crown keep it's flared shape better and make it feel more like an inflexible metal crown.  I used matching metallic gold fabric glue to add a large acrylic gem on the top.  There are smaller gems attached to the tabs on the sides like I did for my "crownlace".


However, when I had finished assembling the parts, I noticed that I was able to twist the top around.


  I thought that was kinda neat.  And, it inspired the design of the hat I will post next.

Tuesday, August 13, 2013

Tabistry Domed Hat Tutorial is now available on Etsy


This is a set of domed or rounded topped hats.  I'll have the flat-topped and open-topped tutorials available some day.  And, now all the steps and techniques necessary are included in the files.  No need to buy the Basics with my tutorials, unless you would like further techiniques.

You can find it here:

https://www.etsy.com/listing/159573974/tabistry-pop-top-domed-hat-pdf-tutorial

We've moved to Patreon!

Thanks for the patience!

Monday, December 3, 2012

It's Been a Dread-fully Long Time...

... since I've shared a tabistry project.  But, don't fear.  I haven't thrown in the tabs.  Just a little behind sharing projects.  In fact, here is my 2nd attemtp at a full-sized top hat.  My 1st large top hat can be found here and a mini one here. 


This pic is kinda creepy, huh?  As you'll see, I took the shots on a styrofoam head, so I thought I'd spruce up a couple in photoshop.  :)  


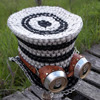
I've been playing with a slightly different tabistry approach this time around.  Instead of weaving the entire crown in one piece, I wove vertical pieces with black fleece that were then joined together with a dark gray fleece.  This actually took somewhat longer, but I like the subtle stripe effect.


Unlike the first top hat, this one is round on top instead of oval-shaped.  I put a bit of flare in the top by making the top larger than the crown and increasing the number of tabs in the top rows of the crown.


The hatband was an old chain belt my sis found 2nd hand for us (Thanks sis!).  The dreads were a last minute add on that were clipped into the inside of the hat using small inexpensive lanyard hooks.  There are a couple of dreads on each hook made with mostly acrylic yarn.  I think I'll make a few more to fill it in more.  Mr. Sam wore it with the dreads around the campground at the Texas Renaissance Festival for Steampunk Invasion on Pirate Weekend.  It was really strange seeing him in long hair.  :)


I'm working on getting some more can/bottle goggles finished, and I'd like to make some other larger projects.  But, wrapping up some unfinished tutorials is going to have to come first, I think.  I'll keep you posted on my progress.

Sunday, September 23, 2012

New Hat for the Ball

So, what HAVE I been doing as far as tabistry goes lately? Well, I made a quick small hat for the Sky Commodore's Autumn Masquerade Ball a weekend ago.


Finally a hat to match my blue/tan corset.  Yep, another hat!  I'd been pondering what style of hat would look nice with it.  As I mention on my general craft blog (mieljolie.blogspot.com), most of this outfit was stuff I'd already made or found like the corset and underskirts, but I managed to make the new tabistry hat to match my corset and a gold overskirt and sleeves.  And, I pinned the straps from the corset as a decoration on the skirt.


The hat is small and was pretty easy to get made in time.  I finished it in under two days.  :)  More than I can say for the overskirt, which I'm still not happy with.  But, alas, that is a story for my other blog.  I used a gold shoelace attached to the inside to tie and keep the hat on my head.


Since this was a masquerade ball, I was going to make a new mask to match my corset, but I decided to just wear my old one instead.  I think I wore it all of one song before taking the mask off anyway.  I just don't like having things on my face.  Here it was just before it came off for good that night.


I'm working on some other costuming and stuff.  And, I try to work on the tutorials whenever I have spare time, so new tabistry projects just aren't getting done right now.  Among other things, I would like to get another top hat made, and I'm trying to start a new corset for a fairy costume.  We'll see if it gets out of my head and into the world.  Until then, be Can-TAB-ulous!

Monday, April 2, 2012

Beer Goggles and a Tabistry Top Hat


As I mention on my general craft blog, we just got back from attending the Nightmare Machine Paranormal Steampunk Convention in Jefferson Texas. It was organized by the Steampunk Illumination Society. I heard they were having a silent auction to raise money for the nonprofit organization and their plans to fund acquiring a building to host events, so I offered up a tabistry top hat and some "beer goggles" to help the cause.


The top hat was an experiment. I plan to make one for a friend of ours in the near future, but wanted to get the shape right before making his. I think it turned out pretty close to what I wanted, except that I found I need to make it a wee bit larger.


The goggles were really fun to put together. I tried to use mostly parts from cans on them. The eye pieces are, of course, can tops from Miller Lite. I liked the gold tops to go with the gold rivets I had.


I punched out the mouth opening to see through and put in lenses made of green plastic bottle that is held in with the bottom of the can.


All of this is riveted to the leather sides. I used a wide can tab to attach the strap to the sides. It worked perfectly.


Then, I used another can tab and a short piece of wire to make the buckle in back. Most of the leather was scrap from my mans leather hats.


Above is a close up of the can tab buckle. I got a little bit of shoe polish on the buckle, as you can see. But it rubs off of aluminum pretty easy.


They did really well at the auction. Though we auctioned them separately, they both got to stay together when they went home with some new friends we met while there that came over from Shreveport Louisiana. Great family. I hope the hat and goggles provide as much enjoyment for them as they were for me in making them. Besides making two more possible top hats, I plan to experiment on the goggle idea again in the future, as well.


BTW, I also made a quick monocle out of an aluminum bottle. I talk about that more on my general crafting blog (mieljolie.blogspot.com). Thanks for stoppin' in!

Monday, July 18, 2011

Another Topless Hat

If you've been keeping up with the last two posts on here, you'll know I'm making some items for a RMH charity auction held in Kentucky in August. This hat is the last of these items.


It's a "topless" hat similar to the green one I made my mom. I chose this style because it is practical and easy to wear everyday, even with a ponytail. And, it would be easier to ship, too. When mom occasionally wears her own hat about town, she gets many nice comments even before they realize what it is made of.


This hat is woven with blue, white and gray polar fleece remnants to match the bag and the cozy. If you're interested, the pattern for this hat is available in my Etsy store.Link


The crown is made using a mix of larger soup and fruit can tabs and the small square ones. I used a few small blue acrylic gems on the crown to go with the large blue gem on the purse.


Above is a pic of all the items I'm sending (minus the model, of course). I was going for a set that could all be used together, perhaps on a game day.


If you're curious, the "new" model wearing this hat is a styrofoam head I picked up with an old hat and hat box. Got the lot for $5! Never know what you'll come across secondhand bargain hunting. At close inspection, she looks a little care worn, but she suits her purpose just fine for me. It's great to be able to shoot pics once in awhile without bugging the family to play dress up. :)


I'll post any news I hear about how the auction went, if I hear any. Sure hope they like these pieces and they're a big hit there. Now back to finishing some tutorials I'm severely behind on.

Wednesday, June 1, 2011

My New Pirate Hat


Hmmm...Now, where did I bury that treasure? :)


For Scarborough Ren Faire's Pirate Weekend, I wanted to whip up a new pirate hat. All this time has gone by, and I hadn't made myself one, yet. Finally, I got it somewhat wearable just minutes before we headed out.


Though, I didn't have the trim finished til just yesterday. Now, I need some feathers and other decorations to top it off. Can't decided what color the feathers should be. I'm thinking red to go with my corset. The flat cap that I originally made to go with the corset just wasn't doing anything for me. :)


I made this hat slightly shallower than my mom's hat that I posted about here. The weight keeps it firmly in place even on a significantly breezy day. I also decided to pin up the back on this one, as well. I tried painting some of the tabs black at the tip to reduce the amount of shiny silver showing. I also used some metallic gold shoelaces for the trim.


If you'd like to attempt your own tabistry pirate hat, I provide the pattern for my mom's hat with instructions for constructing hats (including taking measurements) in my POP TOP tutorial with 4 patterns available on Etsy.com. A tricorne is basically a wide brimmed sun hat that is pinned up to form three sides.

BTW, this month seems to be brimming with hats. I'll be posting some made-over felt hats and a paper mache one on my general crafting blog (mieljolie.blogspot.com) very soon. The SO has also just finished a red leather top hat. Feel free to come check those out when I get them posted.

If you'd like to make one of these, head to Patreon for a tutorial to make your own brimmed domed-top hat. 

Sunday, March 6, 2011

Mardi Gra Steampunk Style - Hat and Mask


Had a costume party to attend this past Friday, so we worked on a few new steampunk items and changed up a few older ones. I was pretty stumped on what to wear to a Mardi Gras party that was Steampunk themed. So, of course I went Tribal Fusion-style as a base and added a mask and hat. ;)


I whipped up a quick mask. It kinda resembles an owl with the wispy ostrich feathers on the sides. I must thank Heather for supplying me with some of the gold-toned tabs. See, they did come in useful after all. :)


I also added a new brown feather and silver painted clip light to my hat. I wore hair flowers with some yarn falls in the back. The light came in quite useful, too. It was dark out when we got there making it somewhat difficult to put on last minute accessories beside the car.


Had a blast at the party! I'll be posting our other accessories on the craft blog (mieljolie.blogspot.com).