Wednesday, January 12, 2011

Just something to show I'm thinking of you


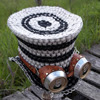
I honestly don't care much for Valentine's Day. It's never rated very high on my list of favorite holidays. However, I'd like to share a little something, so you won't think I've abandoned my blog. I created this with my daughter out of some leftover scraps from other projects and a bamboo chopstick. I need to work a little on the flights of the chopstick arrow. I wanted to try making them out of bottlecaps. And the shaping on the top is just not quite there, yet. But, whatcha think? Does it sorta resemble a heart?

No time lately to work on any new large elaborate tabistry projects. I'm still working on tutorials and revamping my steampunk underbust corset. I'll post when I have something. Thanks for the patience.

Have a Happy Valentine's Day!

Sunday, December 19, 2010

Some Holiday Sparkle - Tabistry Style


So, I've been a bad girl and not shared some of my past experiments. Last year while working on the stocking, I made some quick ornaments. I was hoping to take them a little farther before posting about them. But, since I didn't finish them, and another Christmas is passing me by, I thought I'd get them up "as is" and maybe inspire some of you to create some last minute gift ideas for those who have everything. ;)

Who needs to blow tons of money on tree bling, when you can make you own ornies from stuff around the house. At our house, we try to make at least one unique ornament each year. They definitely have more sentimental value this way. My daughter's tissue paper princess dolls, that we made her on her on her 2nd Christmas, are still the first decoration to deck the tree every year. But, it's more fun now that she make's things along with us.


I figured out how to make this star/snowflake? shape when I was working on my cloak shoulders. Sorry for the blurry pic. The flash doesn't like the glimmer of the tabs or metallic shoelace. I can make the points using one continuous material strip (meaning less tying off). If more rows are added over it, you can get a much more drastic scallop edge or even pointer star by repeating the technique at the same location (which is how I achieved the star in the image at the top of this post). That one, which has been filled in with a different material to form a circle, will be a future lid for a gift box.


This ball is about 3 1/4" and was created in two pieces and stitched together. I'm challenging myself to make one even smaller. I think I'd like to make some with a zipper around the middle to put potpourri or other items in. Of course, it needs a prettier loop to hang it, too. :)

Have a Merry Christmas and a Happy New Year!!

Wednesday, November 3, 2010

Another crazy October has passed...


...and I finally finished a tabistry project! Yay!

Meet the new corset addition. I finally finished an underbust corset and matching mini top hat just in time for Halloween. The corset still needs some minor adjustments around the front top edge. I was strapped for time and just had to go with it. I'm debating to remove or add some tabs where the lacing is. The gap where the lace holes begins is not suitable to me. I also plan to add a trim around the whole corset to finish it off better. That ought to help out a bit.


The hat was actually created on the 4+ hour drive on the way to faire. I was working on the brim the next morning as the others were still getting dressed. :) I want to play with the style of it a little bit more. Then, I will most likely adding it to the POP TOP hat tutorial available on Etsy.com


Remember back when I mentioned I'd share a new technique on giving tabs some color. Well, this was the project I'd been meaning to discuss it on. If you look closely at the pic below, you'll see that I wove the tabs upside down and that I hand painted each one with fingernail polish. I made a graduating pattern from gold to burgundy to dark purple to black and back down to gold. I think the paint really tones down the shiny silver tabs.


Since this was to be a steampunk piece, I wanted something a little different. As you might, or might not, have noticed, I tried something new on the seams. I wove them together using more tabs running across the seam. When it is pulled apart the tabs kinda peak through.


You can read about the whole steampunk outfit on my craft blog here. Ciao, until next time!!