Wednesday, September 3, 2008

Bellydance Costume Progress

As embarrassing as it is, here are some pics I promised to put up of the bellydance costume I'm working on getting finished. It has been raining here and while I was getting photographed I was experiencing a nice cold mist on my exposed parts. Brrrr...

I'm repurposing my empire waist bodice I wore to faire. Currently, I'm experimenting and adding all the dangly things to my belt. As you can tell in the pics, the sleeves are removable and I only have one on. I had to make the piece on my stomach wide enough to hide my beautiful appendectomy scars. (The surgeon was a butcher, but I'm still alive and kickin' so all is good.)

Anyway, there will be a round flower thing on both hips (maybe with a turquoise jewel in center) as well as many hanging strings of tabs all around similar to the front. I'm probably ditching the overskirt seen in the first few pics.


can tab bellydance in progress can tab bellydance in progress

can tab bellydance in progress can tab bellydance in progress

Monday, August 4, 2008

New Hats! And, future tutorial!

I've got 2 new hats to show off!

Just finished a topless for my Great Aunt Claudine made with yellow t-shirt scrap and multi-colored yarn.

claudine's can tab hat

The other is a sun hat made with blue and white fleece strips that was made by request for a fellow crafter on http://www.craftster.org/. She's giving it as a gift to someone who collects hats. I tried some new techniques on this one. I figured out a way to weave muli-colored patterns (hard to see the music notes here) and a new way to attach the pieces together. Mom is modeling it til I can get some pics from the new owner.

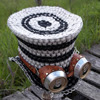
can pull tab sun hat

can pull tab sun hat top

can pull tab sun hat

I'm currently working on a tutorial on creating tabistry and how to make a pop top hat. I may also work on a "how to" video as well. So, in the near future, anyone interested will be able to get a copy to create their own.

***** UPDATE 09/18/09 *****

Thank you to everyone who have helped make my tutorials better. I now have two up finished and now on Etsy.com (when in stock) here:

mieljolie.etsy.com

I opted not to use craftedonline.com at this time. I may in the future, but for now I will just stick with Etsy.

Wednesday, July 2, 2008

Mom Needs a New Pair of Shoes!

Well, just like the title reads, my mom was complaining about not having comfy shoes to go with her outfit. So, I said, "Why not make some!" Out of can tabs, of course! One day later, here one is:

mom's shoe top

shoe side

mom's oufit with shoe

mom's can tab shoe right

Strange style for her outfit, I know, but they definitely fit her personality. :) She says they are comfortable, but we will have to field test that at TRF before a true judgement can be made. We need a louder bell, jewel, or charm for the toe.

***********************************************

As requested, here is a pattern for making a shoe like the one above. This is a simplified version. The original has a left and right side, but I altered it so it would be easier.

can tab shoe pattern
To join the two pieces, I tied the ends of the top and bottom toe point together. Then pulled a separate strips of fabric/cord between the two layers on each side of the shoe starting at the top most point. Pull the ends out of the first holes on either side of the top point. Then, start weaving into the next hole of the top layer down thru the bottom layer and then move over a hole on the bottom layer and up thru the same top hole. Then move over to the next top hole going down to the next hole in the bottom layer. Keep repeating this until you reach the last hole of the top layer. Be sure to alway go to a new hole on bottom and the same hole on top to get the curled toe.

When the toe is finished, continue around the shoe to soften the edge and make the opeing smaller. Next, with a new strip start joining the side to the bottom 'til you reach the back. I ran a strip of vertical tabs up the back to hold the two sides together. The last tab should stick up in the back where you could add a lace to tie them around your ankle.

I highly recommend lining the inside with soft fabric for extra cushion.

*********************************************
The illustration below shows how to create the staggered weave pattern needed to make the shoe.:
staggered can tab pattern